Robot Visualization
For the robot visualization in 3D Slicer, one first need to properly configure a robot in ROS 2. The default ROS approach requires:
A robot state publisher node which will make the URDF description available as a ROS parameter for other nodes. The robot state publisher will also compute the forward kinematics and broadcast the 3D position of each link to TF2.
A source (publisher) for the current joint positions. This can be an actual robot driver or a script emulating the robot.
Before testing SlicerROS2, you should always check that your setup is correct and works with RViz.
Once the ROS robot is set up properly, the SlicerROS2 robot node can be used to visualize the robot in Slicer. Internally, the robot node will use a parameter node to retrieve the URDF description and TF2 lookups to refresh the position of each link.
Robot visualization uses the ROS parameter and TF2 features described in Parameters and TF2. If your robot also has a MoveIt configuration, see Motion Control after loading the robot.
Note
VTK natively imports .stl and .obj meshes. We use the Assimp library
to support other CAD formats like .dae.
ROS Robot
The following are examples of robots we’ve used to test the SlicerROS2 module. They can be used without the actual hardware if you just want to try SlicerROS2.
They cover serial robots (Phantom Omni and Cobot) as well as a robot
with parallel linkages (dVRK PSM). The SlicerROS2 module should work
with any other robots as long as the links CAD files are supported
by VTK or Assimp (e.g. .stl, .obj, .dae).
Universal Robot
For the UR, we recommend the default packages that come with ROS 2 Jazzy:
sudo apt install ros-jazzy-ur
We provide a consolidated launch file that starts the UR driver with mock hardware (no real robot or simulator required) and MoveIt:
ros2 launch slicer_ros2_module ur_sim_control.launch.py
By default this launches a ur5. To use a different model:
ros2 launch slicer_ros2_module ur_sim_control.launch.py ur_type:=ur10
Supported values for ur_type: ur3, ur5, ur10, ur16.
Pass launch_rviz:=true to also open RViz with the MoveIt motion
planning plugin:
ros2 launch slicer_ros2_module ur_sim_control.launch.py launch_rviz:=true
Once the launch is running you should see:
[move_group] You can start planning now!
The MoveIt planning group is named ur_manipulator.
Finally, in a separate terminal, start 3D Slicer. After sourcing your workspace, use the provided launcher so that the correct module paths are configured automatically:
cd ~/ros2_ws
source install/setup.bash
ros2 run slicer_ros2_module slicer
You can pass additional arguments directly to Slicer:
ros2 run slicer_ros2_module slicer --homedir /tmp/foo
After these steps you should be able to load the robot in SlicerROS2!
Once the robot is visible, you can use it for motion planning in Motion Control.
Kinova Gen3 Lite
Kinova provides the official ROS 2 Kortex packages for the Gen3 and
Gen3 Lite arms in
ros2_kortex.
Follow the repository instructions to clone the packages, import the
ROS 2 dependencies with vcs, install dependencies with rosdep,
build the workspace, and source the resulting install/setup.bash.
Compilation may take a few minutes.
To test SlicerROS2 robot visualization, use the provided launch file:
ros2 launch slicer_ros2_module kinova_description.launch.py
This starts robot_state_publisher from an arm-only Gen3 Lite URDF
and opens joint_state_publisher_gui with six arm joints. It
provides robot_description and TF2 link transforms, which is enough
to load and move the robot in SlicerROS2.
cd ~/ros2_ws
source install/setup.bash
ros2 run slicer_ros2_module slicer
After these steps you should be able to load the Kinova robot in SlicerROS2.
To test MoveIt integration, stop kinova_description.launch.py and
launch the Kinova fake-hardware MoveIt helper instead:
ros2 launch slicer_ros2_module kinova_sim_control.launch.py
This launch also uses the arm-only model, so MoveIt exposes a single
planning group named arm. Wait for move_group to report that
planning can start. Then load the robot in SlicerROS2 using the same
defaults as above, open ROS2 Motion Control, and use arm as the
MoveIt planning group. Dragging the motion-control gizmo should run IK,
and the Plan button should produce a preview trajectory.
Phantom Omni
The Phantom Omni is an entry level haptic device initially sold by Sensable. Later on, it has been renamed Geomagic Touch or 3DS Touch. The initial version used a FireWire connection. Later models used Ethernet and more recently USB.
Full cisst/SAW stack
Installing the cisst/SAW Omni code base is not too difficult, but it will take a`few minutes to compile. It is useful if and only if you happen to have an actual device. You can find the build instructions for ROS 2 in the README for https://github.com/jhu-saw/vcs.
Models only
If you prefer to not compile the full dVRK cisst/SAW, you can get the URDF and models using clone:
cd ~/ros2_ws/src
git clone --filter=blob:none --sparse https://github.com/jhu-saw/sawSensablePhantom
cd sawSensablePhantom
git sparse-checkout set models
Testing
Don’t forget to build and source the ROS workspace after cloning. The
package sensable_phantom_model contains the URDF, STL meshes, a
launch file for the robot_state_publisher as well as a dummy
script that publishes a joint trajectory, so one can see the arm
moving around.
To start the robot_state_publisher, use:
ros2 launch sensable_phantom_model omni_rviz.launch.py fake_hardware:=true
Then, to start the robot’s dance, use another terminal:
ros2 run sensable_phantom_model pretend_omni_joint_state_publisher
dVRK PSM
The dVRK PSM (da Vinci Research Kit Patient Side Manipulator) is based on the first generation da Vinci RAMIS system (Robotically Assisted Minimally Invasive Surgery) sold by ISI (Intuitive Surgical systems).
Cobot
We also tested SlicerROS2 on myCobot by Elephant Robotics, specifically the myCobot 280 M5 Stack. The ROS 2 interface for the device can be found here and drivers can be installed from the Elephant Robotics website.
Assuming the interface (mycobot_ros2) is cloned under the same
ros2_ws, you can start the robot state publisher with RViz using
the following command:
source ~/ros2_ws/install/setup.bash
ros2 launch mycobot_280 test.launch.py
The state publisher can also be started manually using the following steps:
cd ~/ros2_ws/src/mycobot_ros2/src/mycobot_ros2/mycobot_280/mycobot_280/config
python3 listen_real.py
It is possible that you will need to change the port specified on line
14 of listen_real.py depending on your device. The .dae files
in the robot description also need to be converted to STLs (an online
converter will work) and the paths in the URDF file should be updated
to reflect this change.
Once running - make sure your robot is in Transponder Mode. More instructions for basic operation of the myCobot can be found in the Gitbook
Slicer Robot
Adding and removing robots
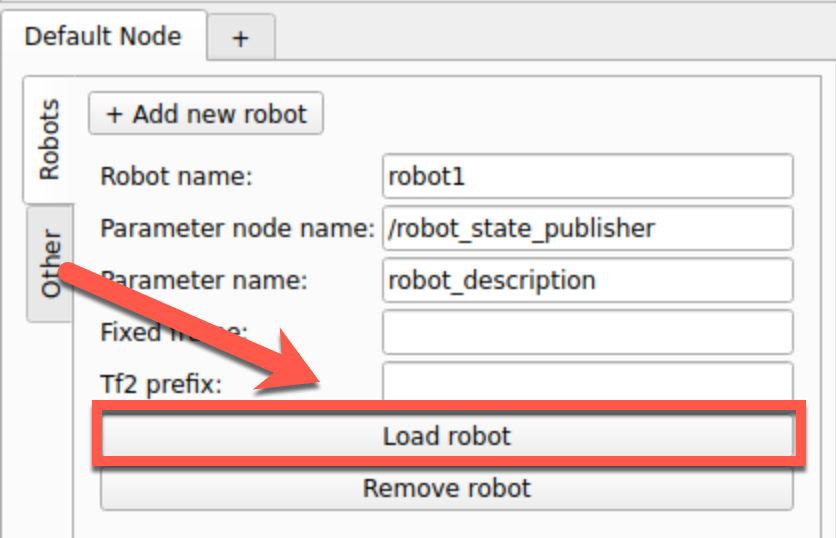
We’ve simplified loading the robot by adding some shortcuts on the
widget UI. The default parameter node name: /robot_state_publisher
and parameter name: robot_description should work for most
cases. These are set as the default in the UI. To load a robot with
these parameters, press the “Load Robot” button:
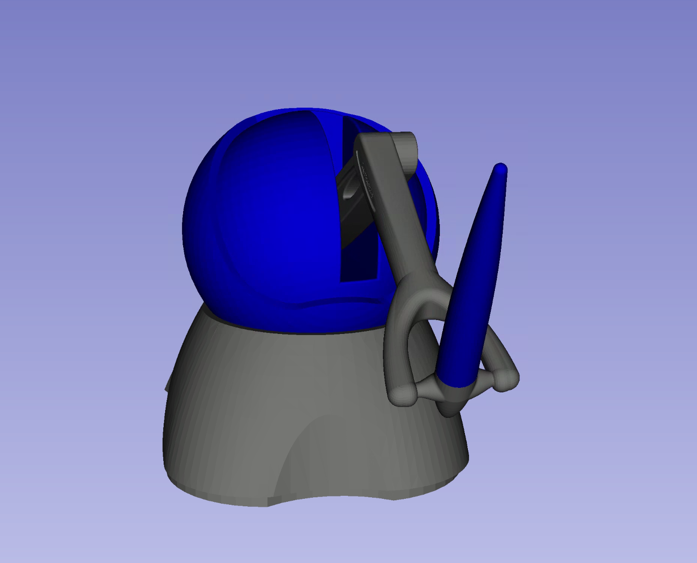
At that point, the robot’s model should be loaded and displayed in
Slicer. To do this addition programmatically, please see the
documentation on the vtkMRMLROS2RobotNode. Note that if your robot
uses a namespace, you will likely need to prefix this on the parameter
node name. The PSM for example requires
PSM1/robot_state_publisher.
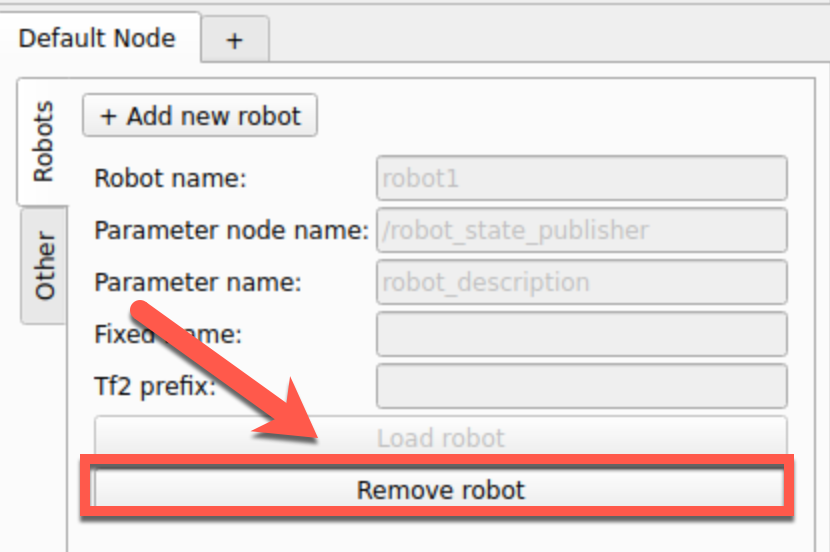
To remove the robot from the scene you can press the “Remove Robot” button.
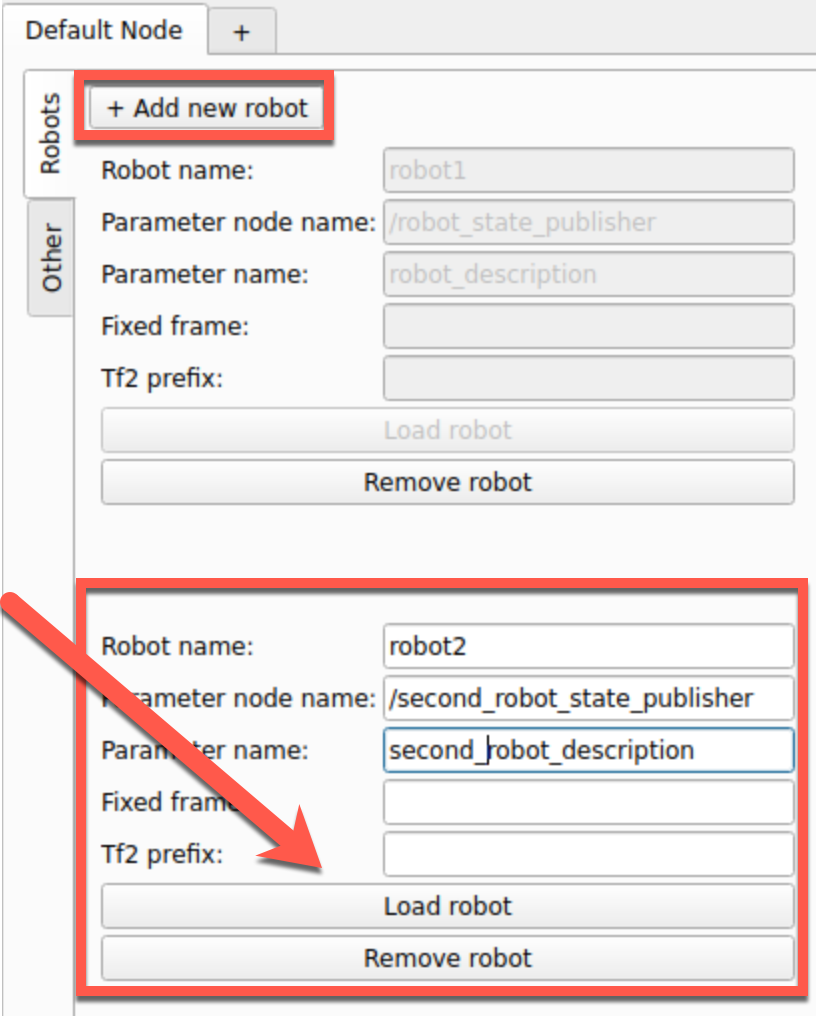
To add more than one robot, you can press the “+” button and the widget will update with additional line edits for the second robot.
Tips and tricks
Fixed frame
All cartesian poses used to display the robot’s links are defined with
respect to a base frame, also know as “Fixed Frame” in RViz. The
default in RViz is “map”. This default is often ignored in URDFs. When
the “fixed frame” is not correctly defined, you will get some warnings
regarding lookups in TF2 not found. For example, the Phantom Omni URDF
uses the reference frame base.
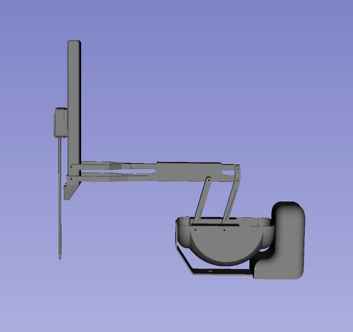
The UI for SlicerROS2 robot also has a field to specify the fixed frame of the robot. The default behaviour is to use the first link of the robot as the fixed frame if this field is left empty. For non-holonomic robots, this feature may be necessary for visualization. The example below shows a rendering of the TurtleBot in 3D Slicer using this feature.
Hint
To help figuring out the frames currently declared, you can also
use ros2 run tf2_tools view_frames once the robot is launched
(see ROS documentation).
ROS namespaces
Namespaces are frequently used for ROS applications. They allow users
to declare multiple robots with the same topic, service, tf… names
without conflicts. For example, the joint state publisher use the
topic /joint_states by convention. If you have multiple robots,
you can use a namespace to isolate the topic. For example, the
Phantom Omni package uses the the namespace /arm and the joint
state topics becomes /arm/joint_states. If you are unsure which
namespaces are used, you can list all the current ROS topics using
ros2 topic list.
To set a namespace on an existing node (for example /arm), you can
use the option --ros-args --remap __ns:=/arm.
Warning
When you specify a namespace using the command line, make sure to
remove any trailing slash. The following won’t work:
--ros-args --remap __ns:=/arm/